Your professor just emailed: “Submit your assignment as a single PDF, under 10 MB.” You have a Word document, three screenshots, and a scanned handwritten page — all in separate files, totaling 28 MB. The deadline is in two hours.
Or you’re building a presentation for your group project. Your teammate sent product photos with messy backgrounds. Another teammate’s section is a Google Doc that needs to be a PDF. The slide deck needs clean visuals, and every file is in the wrong format.
Or it’s the end of the semester. You’re applying for an internship that wants your resume, cover letter, and transcript in one PDF. You have them in three different formats across two devices.
These aren’t hypothetical problems. They’re Tuesday for most students. And the usual solutions — asking a friend who has Photoshop, downloading sketchy software from a forum, paying for a tool you’ll use once — are all terrible.
The good news: every one of these problems can be solved in under a minute, for free, directly in your browser. No installations. No signups. No subscriptions eating into your already nonexistent budget.
Here are 10 free online tools that handle the file problems students face every week — and how to use each one.
Why Students Need Free Online Tools
Students deal with more file types and format requirements than most working professionals. A single week might involve submitting a PDF essay, resizing photos for a blog post, compressing a presentation to fit an email attachment limit, converting a Word doc for a group project, and removing the background from an image for a slide.
The problem isn’t that solutions don’t exist. The problem is that the obvious ones cost money. Adobe Acrobat wants a monthly subscription. Photoshop is even more expensive. Microsoft Office’s built-in tools handle some conversions, but they’re inconsistent and limited.
What most students don’t know is that browser-based tools have caught up — and in many cases surpassed — desktop software for everyday tasks. They run on any device (laptop, Chromebook, tablet, phone), they process files locally in your browser so nothing gets uploaded to unknown servers, and they’re completely free.
No software license. No storage space wasted on an app you’ll use twice a semester. Just open the tool, do the thing, and get back to your actual work.
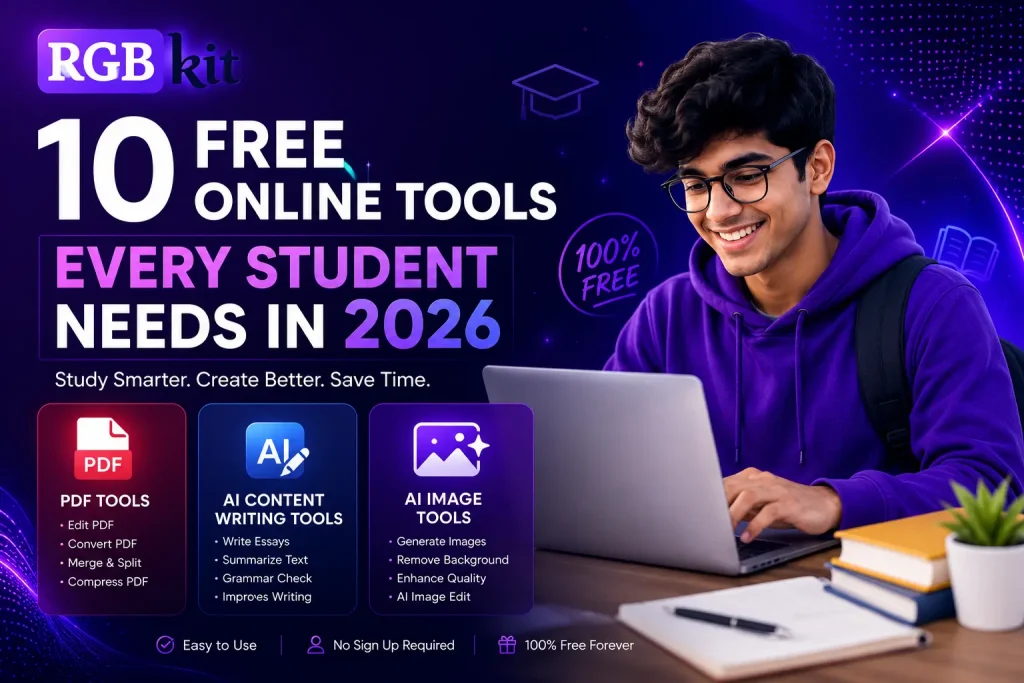
The 10 Tools Every Student Should Bookmark
1. Compress PDF — Shrink Files That Are Too Large to Submit
Every learning management system has a file size limit. Blackboard, Canvas, Moodle, Google Classroom — they all cap uploads somewhere between 10 MB and 50 MB. And academic PDFs are almost always too large. A research paper with embedded charts and images can easily hit 30 MB. A scanned textbook chapter might be 60 MB. A presentation exported as a PDF with high-resolution slides can break 100 MB.
You could lower the export quality, but then your charts become blurry and your images look like they were taken with a flip phone. That’s not a trade-off — that’s self-sabotage right before a grade.
RGBKit’s Compress PDF tool reduces file size intelligently. It optimizes images, strips unnecessary metadata, and streamlines the file’s internal structure — without any visible quality loss. A 30 MB assignment can drop to 5 MB while looking identical to the original.
When you’ll use it:
– Submitting assignments that exceed the upload limit
– Emailing a professor a file that bounces back as “too large”
– Sharing project files in a group chat without everyone’s phone storage crying
– Uploading a portfolio PDF to an internship application portal
2. Merge PDF — Combine Multiple Files into One Document
The single-upload requirement is everywhere. Job applications want one PDF. Scholarship portals want one PDF. Course submissions want one PDF. But your materials live in five different files created in three different applications.
Your resume was made in Google Docs. Your cover letter is a Word file. Your transcript is a scanned PDF from the registrar’s website. Your recommendation letter arrived as an email attachment. Your portfolio is a separate document entirely.
RGBKit’s Merge PDF tool combines any number of PDF files into a single document, in the order you choose. Drag them into sequence, click merge, and download one clean file that’s ready to submit.
When you’ll use it:
– Internship and job applications that require a single PDF upload
– Scholarship submissions with multiple supporting documents
– Group project submissions where each member’s section is a separate file
– Combining lecture notes, handouts, and your own notes into one study document
3. Remove Image Background — Get Clean Cutouts for Presentations and Projects
Your presentation needs a clean product image, but every photo you found online has a distracting background. Or you’re creating a poster for a campus event and need to isolate a logo. Or your design project requires a transparent PNG of an object, and you don’t have access to Photoshop.
Background removal used to take 20 minutes of careful pen-tool tracing in expensive software. Now it takes three seconds.
RGBKit’s Remove Background tool uses AI to detect the subject of any image — a person, a product, an animal, a logo — and strips the background away, leaving a clean transparent PNG. The edge detection handles even complex shapes like hair and irregular outlines.
When you’ll use it:
– Creating professional-looking slides without Photoshop
– Design projects that need transparent image assets
– Social media graphics for student organizations and clubs
– Portfolio images that need a clean, consistent look
4. Convert Images to PDF — Turn Photos and Scans into Submittable Documents
You took photos of your handwritten notes, a whiteboard diagram, or a textbook page. Now you need to submit them as a PDF. Or you scanned worksheets with your phone’s camera, and the professor wants a single organized document — not a zip file of 12 JPEGs.
RGBKit’s Image to PDF tool takes your images — JPG, PNG, or WebP — and converts them into a clean PDF document. Each image becomes a page. Upload them in the right order, and you get a polished file that looks like a proper document, not a photo dump.
When you’ll use it:
– Submitting handwritten homework or lab reports photographed with your phone
– Converting scanned pages into a single document for an assignment
– Compiling visual research (screenshots, diagrams, photos) into a presentable file
– Turning art or design project photos into a portfolio PDF
5. Compress Images — Reduce Photo Sizes for Websites, Blogs, and Emails
If you’re studying anything that involves a website, blog, or digital portfolio — marketing, journalism, computer science, design, communications — you’ll need to compress images. A high-resolution photo straight from a phone camera can be 5–10 MB. Put ten of those on a web page, and the page takes 30 seconds to load. Your grade suffers. Your audience leaves.
Even outside of web projects, oversized images cause problems. Email attachments bounce. Slide decks become unwieldy. Cloud storage fills up faster than it should.
You can use RGBKit’s Compress Image tool to reduce image file sizes dramatically — often by 60–80% — while keeping them visually sharp. The difference between the original and compressed version is invisible to the naked eye, but the file size difference is massive.
When you’ll use it:
– Optimizing images for a class website or blog project
– Reducing attachment sizes before emailing files
– Speeding up a digital portfolio or online resume
– Freeing up storage on your laptop or phone
6. Convert PDF to Word — Edit Documents You Can’t Otherwise Change
A professor shares a PDF template for a lab report. A study group sends around PDF notes that need corrections. You find the perfect thesis formatting guide, but it’s a PDF and you need to adapt it for your own paper.
PDFs are designed to be final. They’re not meant to be edited. But sometimes you need to pull content out of a PDF and rework it in a word processor — rewriting sections, reformatting tables, updating outdated information.
RGBKit’s PDF to Word tool converts any PDF into an editable Word document. Text, images, and layout are extracted and reconstructed so you can edit freely in Word or Google Docs. The better the original PDF was structured (typed text rather than scanned images), the more accurate the conversion.
When you’ll use it:
– Adapting PDF templates for your own assignments
– Extracting text from research papers for your literature review
– Editing shared notes or study guides that were distributed as PDFs
– Updating older documents that only exist in PDF format
7. AI Content Detector — Check If Your Writing Gets Flagged
Universities are cracking down on AI-generated submissions. Professors use detection tools to scan essays, and if your paper gets flagged — even if you wrote every word yourself — you could face an academic integrity review. The problem is that certain writing patterns, sentence structures, and phrasing can trigger false positives even in fully human-written work.
Before you submit, you need to know what the detection tools will see.
RGBKit’s AI Content Detector scans your text and tells you whether it reads as human-written or machine-generated. Paste your essay, report, or paper, and get a clear breakdown. If sections get flagged, you can rework the phrasing before your professor runs their own check.
When you’ll use it:
– Checking essays and research papers before submission
– Verifying that your paraphrased notes don’t accidentally read as AI-generated
– Scanning group project contributions to make sure everything passes detection
– Giving yourself peace of mind before turning in high-stakes assignments
8. Convert Word to PDF — Submit Assignments in the Right Format
This one seems obvious, but it trips students up constantly. You wrote your essay in Google Docs or Word. The submission portal only accepts PDFs. Your word processor’s built-in “Export as PDF” sometimes changes the formatting — fonts shift, margins move, headers break, embedded images disappear.
RGBKit’s Doc to PDF tool converts Word documents to PDF reliably, preserving fonts, layout, images, and formatting exactly as they appear in your original file. The output is a clean, professional PDF that looks the way you intended.
When you’ll use it:
– Every time a submission portal requires PDF format
– Sending final versions of essays, reports, or proposals to professors
– Creating PDF versions of your resume and cover letter for job applications
– Converting documents before merging them into a larger PDF package
9. Edit PDF — Annotate, Fill Forms, and Fix Documents Directly
Your professor shared a PDF worksheet and expects you to fill in the answers directly on the document. Or you downloaded a scholarship application form that needs your details typed into specific fields. Or you’re reviewing a group member’s draft and need to highlight sections, add comments, and suggest changes — without converting the file to Word and back.
Most students think editing a PDF requires Adobe Acrobat or some other paid software. It doesn’t.
RGBKit’s Edit PDF tool lets you add text, edit existing text, insert images, highlight content with multiple colors, draw shapes, and even sign documents — all directly in your browser. Upload the PDF, make your changes, and download the edited version.
When you’ll use it:
– Filling out PDF forms for applications, financial aid, and campus housing
– Annotating readings and research papers for class discussion
– Adding your name, date, and student ID to assignment cover sheets
– Highlighting and marking up drafts during group project reviews
– Signing permission forms, waivers, and enrollment documents without printing
10. Remove Object from Image — Erase Unwanted Elements from Any Photo
You found the perfect image for your presentation, but there’s a logo in the corner. Or you took a great photo for your portfolio, but a trash can in the background ruins the composition. Or you’re working on a design project and need a clean version of an image — without the text overlay, the watermark, or the random person who walked into the frame.
Traditionally, this required the clone stamp or content-aware fill in Photoshop — tools that take practice to use well and software that costs money you don’t have.
RGBKit’s Remove Object tool lets you brush over any unwanted element in a photo, and it disappears. The tool intelligently fills in the area based on the surrounding pixels, leaving a clean, natural-looking result. No Photoshop skills required.
When you’ll use it:
– Removing watermarks or logos from reference images for presentations
– Erasing unwanted objects or people from photos for design projects
– Cleaning up product shots for marketing class assignments
– Removing text overlays from images you want to repurpose
– Fixing personal photos for portfolios and social media profiles
The Student Workflow: How These Tools Work Together
These tools aren’t isolated — they form a workflow. Here’s how they connect in real student scenarios.
Scenario 1: Submitting an internship application
1. Write your cover letter in Google Docs → convert to PDF with Doc to PDF
2. Your resume is already a PDF → leave it
3. Download your transcript as a PDF from your university portal
4. Merge all three into a single file with Merge PDF
5. The merged file is 22 MB → compress it with Compress PDF
6. Submit one polished, properly sized PDF
Scenario 2: Creating a presentation with clean visuals
1. Find product or subject photos online
2. Remove unwanted objects from photos with Remove Object
3. Remove the backgrounds with Remove Background
4. Compress the images so your slide deck doesn’t balloon in size
5. Drop the clean assets into your slides
Scenario 3: Submitting an essay you want to double-check
1. Write your essay in Google Docs or Word
2. Run it through the AI Content Detector to make sure nothing gets flagged
3. Rework any flagged sections until the text reads as fully human-written
4. Convert to PDF with Doc to PDF
5. Compress*the file if it exceeds the upload limit
6. Submit with confidence
Scenario 4: Compiling a study guide from multiple sources
1. Photograph whiteboard notes and handwritten pages → convert to PDF with Image to PDF
2. Download lecture slides as PDFs
3. Export your own typed notes as PDFs
4. Merge everything into one document with Merge PDF
5. Compress the final file so it’s easy to share in your group chat
6. Share a single, organized, navigable study guide
Tips for Getting the Most Out of These Tools
– Bookmark the tools you use most. You’ll come back to Compress PDF and Merge PDF more often than you think. Having them one click away saves time during deadline crunches.
– Process files in the right order. Convert formats first, then merge, then compress. Compressing individual files before merging sometimes produces better results than compressing one massive merged file.
– Name your files descriptively before merging. `01-cover-letter.pdf`, `02-resume.pdf`, `03-transcript.pdf` sort correctly when you upload them, saving you from rearranging inside the tool.
– Check the output before submitting. Scroll through merged PDFs to make sure the page order is correct. Open compressed files to verify the quality held. Preview cropped images to confirm you didn’t cut off something important. A ten-second check prevents a resubmission.
– Keep the originals. After converting, merging, or compressing, don’t delete your source files. If you need to redo anything — swap out one section, adjust the order, re-export at different settings — you’ll need the originals.
– Use your phone in a pinch. Every tool listed here runs in a mobile browser. If your laptop dies the night before a deadline, you can still compress, merge, convert, and submit from your phone.
Common Mistakes Students Make with File Submissions
Submitting the wrong file format. The portal says PDF. You upload a .docx. It either rejects the file or your professor opens it to find the formatting completely mangled. Always convert to PDF before submitting.
Ignoring file size limits. “File too large” errors appear at the worst possible moment — usually five minutes before the deadline. Compress your files before you’re in panic mode. Make it part of your submission checklist.
Sending multiple files when one is required. Attaching five separate documents when the instructions say “submit as a single PDF” signals that you don’t follow directions. Merge first.
Using screenshots instead of proper exports. Screenshotting a Word document to turn it into an image and then submitting the image as a PDF produces a blurry, unsearchable, unprofessional result. Export properly or use conversion tools.
Forgetting page numbers on long documents. A 40-page thesis draft without page numbers is a headache for anyone reviewing it. Add them before sharing. It takes ten seconds.
Not checking the merged file’s page order. You merged five files. The conclusion ended up before the introduction. Your professor noticed. Always preview before submitting.
Frequently Asked Questions
Are these tools really free?
Yes. Every tool mentioned in this guide is completely free to use on RGBKit. No hidden fees, no “free trial” that expires, no watermarks on the output. You don’t even need to create an account.
Do I need to install any software?
No. All of these tools run directly in your web browser — Chrome, Safari, Firefox, Edge, or any other modern browser. Nothing to download, nothing to install, nothing taking up space on your hard drive.
Can I use these tools on my phone or tablet?
Yes. Every tool works on mobile browsers. Whether you’re on an iPhone, Android phone, iPad, or Chromebook, you can upload files, process them, and download the results directly on your device.
Are my files safe? Do they get uploaded to a server?
RGBKit tools mostly process files locally in your browser. They’re not uploaded to or stored on any external server. This is especially important for students handling sensitive documents like transcripts, financial aid forms, or personal statements.
What if I need to sign a PDF without printing it?
Use RGBKit’s Esign PDF tool to draw your signature and place it directly on any document. No printing, no scanning, no quality loss. Perfect for permission forms, lease agreements, and internship paperwork.
Can I use these tools for group projects?
Absolutely. These tools are ideal for group projects where each member contributes a separate file. One person can merge all the sections, compress the final document, and add page numbers — creating a polished submission that looks like it was produced by a professional team, not four people who met on the first day of class.
Final Thoughts
Student life is already demanding enough without fighting with file formats, size limits, and image editing. These ten tools eliminate the friction that stands between your finished work and a successful submission.
Every tool runs in your browser. Every tool is free. Every tool requires zero technical expertise. Whether you’re compressing a PDF at midnight before a deadline, merging application documents for your dream internship, or cleaning up images for a class presentation — you’re one browser tab away from solving the problem.
Bookmark RGBKit and stop wasting time on workarounds for problems that take ten seconds to solve.